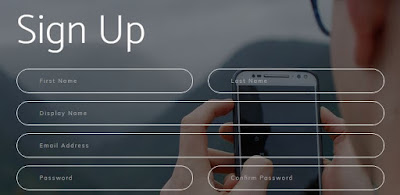
.form-control::-webkit-input-placeholder {
/* WebKit, Blink, Edge */
    color:    #a5a5a5;
}
.form-control:-moz-placeholder {
/* Mozilla Firefox 4 to 18 */
   color:    #a5a5a5;
   opacity:  1;
}
.form-control::-moz-placeholder {
/* Mozilla Firefox 19+ */
   color:    #a5a5a5;
   opacity:  1;
}
.form-control:-ms-input-placeholder {
/* Internet Explorer 10-11 */
   color:    #a5a5a5;
}
.form-control::-ms-input-placeholder {
/* Microsoft Edge */
   color:    #a5a5a5;
}
.form-control::placeholder {
/* Most modern browsers support this now. */
   color:    #a5a5a5;
}
Change placeholder color CSS - cross browser
If you are not using labels in your html text fields you may need to add a placeholder for the text box. But changing placeholder color of an HTML input text field according to your web template need few CSS lines to work in all major web browsers. You have to use different types of pseudo elements to get the job done.
CSS Positions Sticky - a new CSS3 Position make life easy
Making sticky elements was not that straightforward in old days you may have heard sticky headers footers and even sticky.js like javascript files to do the job to create sticky elements in your web pages.
In older CSS versions there were three values for position: relative | absolute | fixed . We can change the offsets of these values by giving bottom or top and left or right.
Relative - Current position of the page - can change it with top left right values without inheriting the other elements in the page
Absolute - Absolute is used to position an element within its parent element. (if the parent element have a position)
Fixed - similar to absolute but it positioned relative to the web browser window instead of the parent div or element even when you scroll
The new value Position : Sticky is a combination of RELATIVE and FIXED
This will be relatively positions untill it reached a value of offset while scrolling the page.
Then it will become fixed.
This feature will not suport in any version of IE or Opera Mini broswers
In older CSS versions there were three values for position: relative | absolute | fixed . We can change the offsets of these values by giving bottom or top and left or right.
Relative - Current position of the page - can change it with top left right values without inheriting the other elements in the page
Absolute - Absolute is used to position an element within its parent element. (if the parent element have a position)
Fixed - similar to absolute but it positioned relative to the web browser window instead of the parent div or element even when you scroll
The new value Position : Sticky is a combination of RELATIVE and FIXED
This will be relatively positions untill it reached a value of offset while scrolling the page.
Then it will become fixed.
.sticky{
top:200px;
position:sticky;
}
This feature will not suport in any version of IE or Opera Mini broswers
Custom image upload and preview inside the button
Customizing HTML file upload button is not always easy. Here is a way to create a custom image upload button (custom file upload button) with CSS Javascript and Jquery and preview the uploaded image instead of the image we used for the custom button.
<div class="image-upload">
    <label for="file-input">
        <img src="http://goo.gl/pB9rpQ" id="blah" />
    </label>
    <input id="file-input" type="file"/>
</div>
CSS
.image-upload > input
{
    display: none;
}
.image-upload img
{
    width: 80px;
    cursor: pointer;
}
Javascript
function readURL(input) {
  if (input.files && input.files[0]) {
    var reader = new FileReader();

    reader.onload = function(e) {
      $('#blah').attr('src', e.target.result);
    }
    reader.readAsDataURL(input.files[0]);
  }
}
$("#file-input").change(function() {
  readURL(this);
});
Subscribe to:
Comments (Atom)

